What is bootloader ?
Its a small piece of code. The Arduino bootloader is run when the microcontroller is turned on(or when you press the reset button). This bootloader initially(for a very small time) waits for a new sketch on the serial port from the Arduino IDE, if it gets something, the new sketch is burned in to the flash memory and run or else it runs the sketch which was previously burned.
Why Bootloader ?
The bootloader exists because there is no standardized protocol for loading the first code, since it is chip dependent. Sometimes the code can be loaded through a serial port, a flash memory, or even a hard drive. It is bootloader function to locate it.
How to bootload new IC ?
If you have empty board to place new ic bootload will become very easy just follow below Circuit Diagrams
| Arduino / Genuino Board | MOSI | MISO | SCK | Level |
| Uno or Duemilanove | 11 or ICSP-4 | 12 or ICSP-1 | 13 or ICSP-3 | 5V |
| Mega1280 or Mega2560 | 51 or ICSP-4 | 50 or ICSP-1 | 52 or ICSP-3 | 5V |
| Leonardo | ICSP-4 | ICSP-1 | ICSP-3 | 5V |
| Due | ICSP-4 | ICSP-1 | ICSP-3 | 3,3V |
| Zero | ICSP-4 | ICSP-1 | ICSP-3 | 3,3V |
| 101 | 11 or ICSP-4 | 12 or ICSP-1 | 13 or ICSP-3 | 3,3V |
| MKR Family | 8 | 10 | 9 | 3,3V |
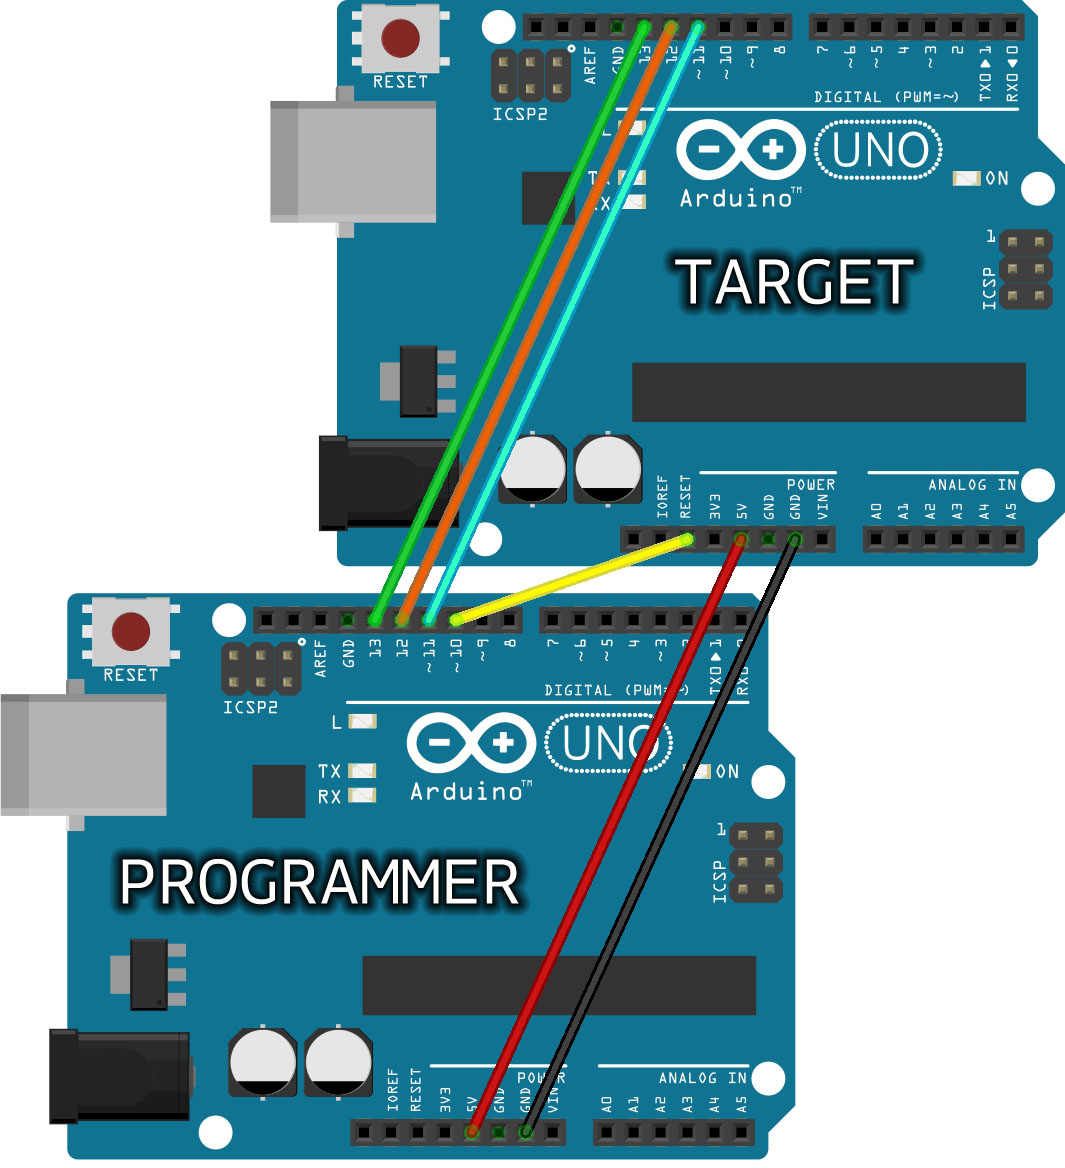
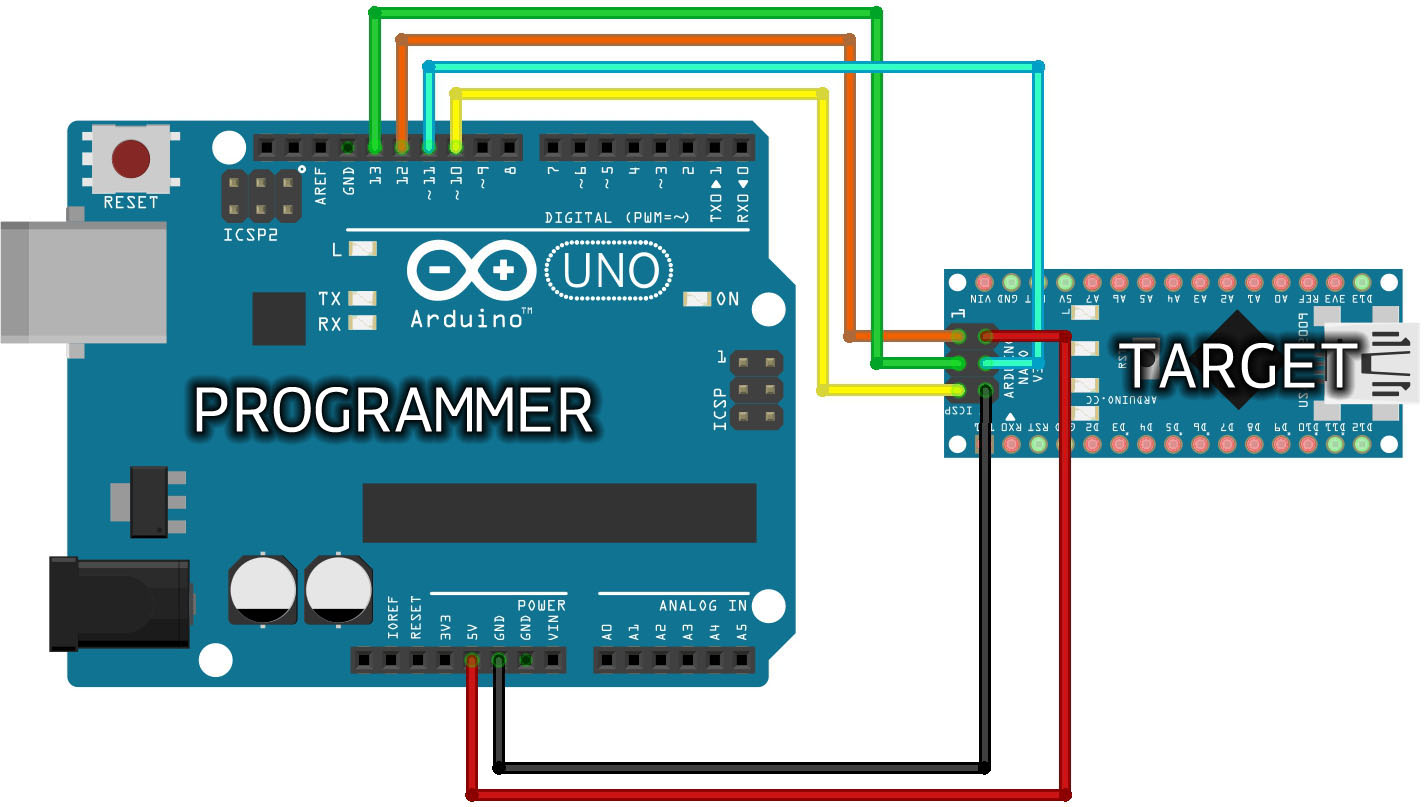
For Circuit Reference:
Note: Target board means the new IC you need to insert in old board to bootload it.
Bootload new Atmega328/Atmega8 using OLD Uno Board
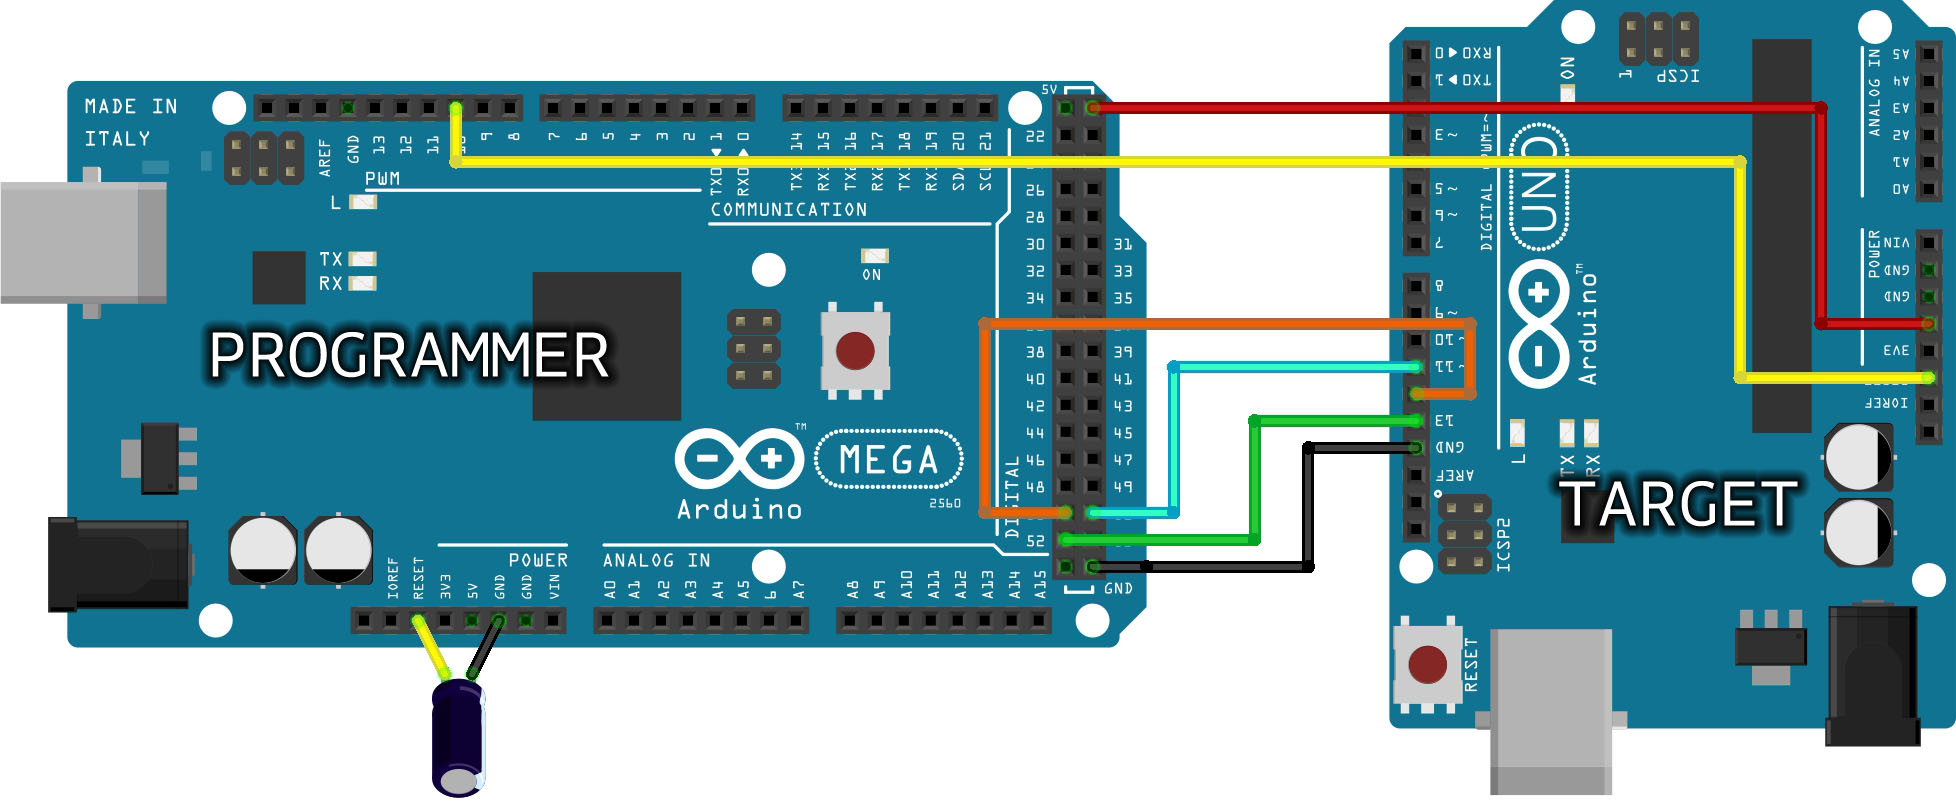
In last Circuit there is capacitor valued 0.10uF.
in arduino mega board you need to connect it. Electrolyte capacitor Positive to Reset and negative to Ground.
Whats Next ?
STEP 1: Open your Arduino IDE. In your menu, select
File > Examples > 11.ArduinoISP > ArduinoISP to open up the Arduino as ISP sketch

STEP 2: Select the COM port for your Arduino as ISP. The COM port may be different depending on how it enumerated on your computer.
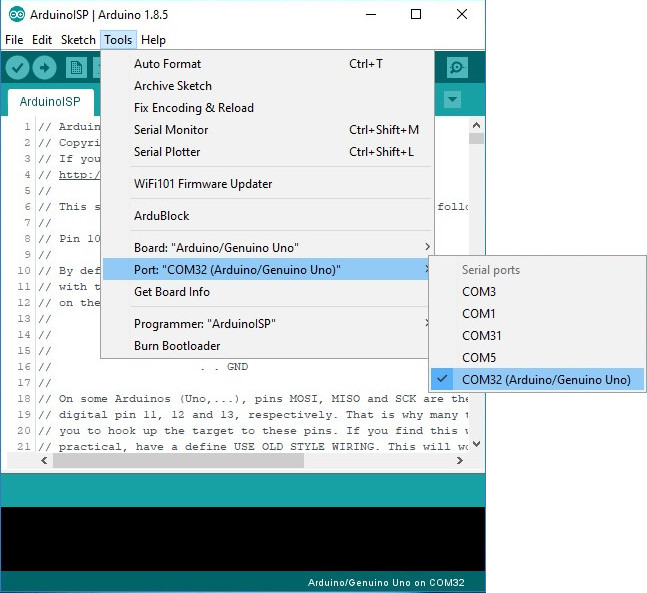
STEP 3: Upload the code to your Arduino to turn it into a AVRISP.

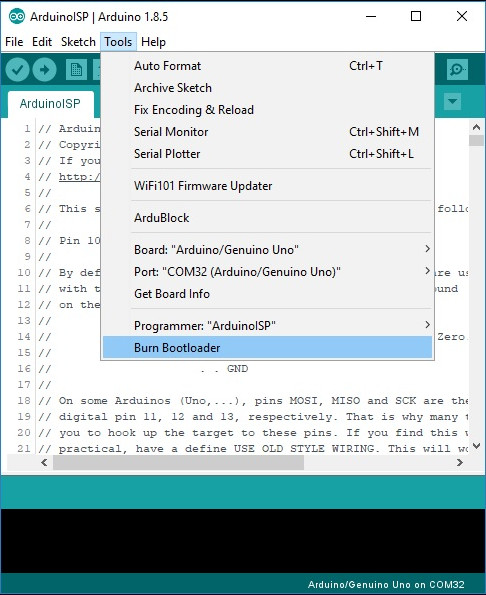
STEP 4: Burning a Bootloader to Your Target
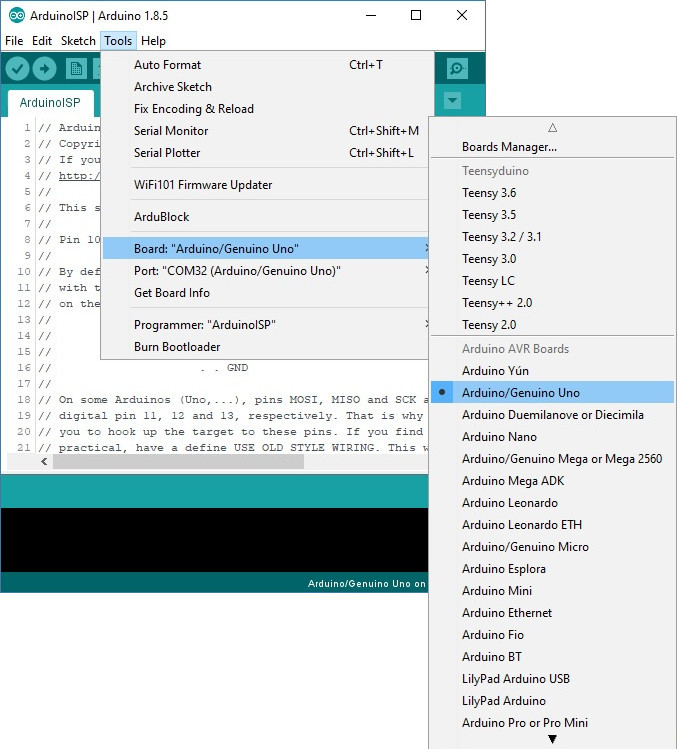
Leave the Arduino as ISP (i.e. your programmer) connected to your computer. If you have not already, connect your target Arduino. Then select the your target Arduino under Tools > Board.
IF you are going to bootload atmega328 ic then select Board as UNO. If you are bootloading some other IC like Atmega8, you need to select that IC as board.
Select the programmer that you are using under Tools > Programmer. In this case, our programmer is an Arduino as ISP so select Arduino as ISP. You will also need to select the COM port that the Arduino as ISP is connected to if you have not selected the COM port already.
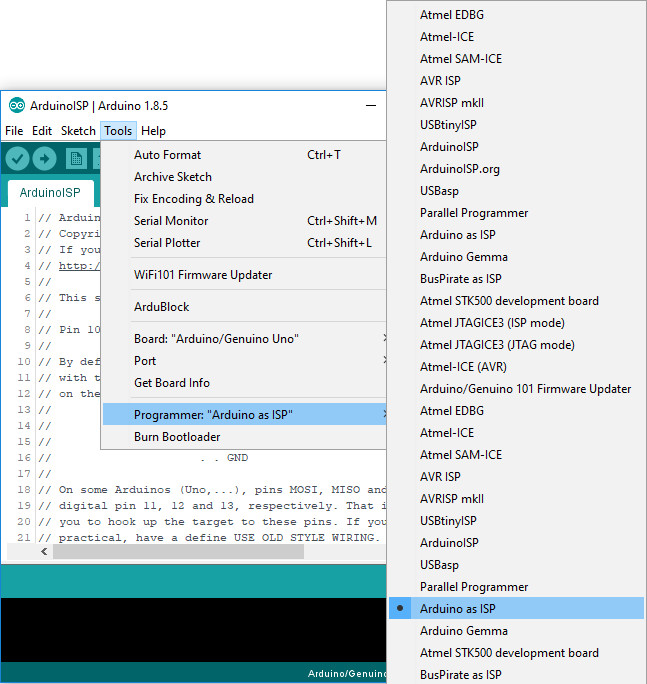
Heads up! You may encounter more than one selection for “Arduino as ISP” in the list of programmers. Either one will work. However, “ArduinoISP” will not work if it is selected.
Finally, select Burn Bootloader. This will take the board you selected in the Arduino IDE and look up the associated bootloader in the board.txt file. Then, it will find the bootloader in the Arduino IDE’s program folder (specifically “…\Arduino\hardware\arduino\avr\bootloaders“) and install it. This only works if the board is installed correctly in the IDE and you have the correct bootloader.
Thats all !!!!
Any doubt ask below~!!!!


No comments:
Post a Comment